
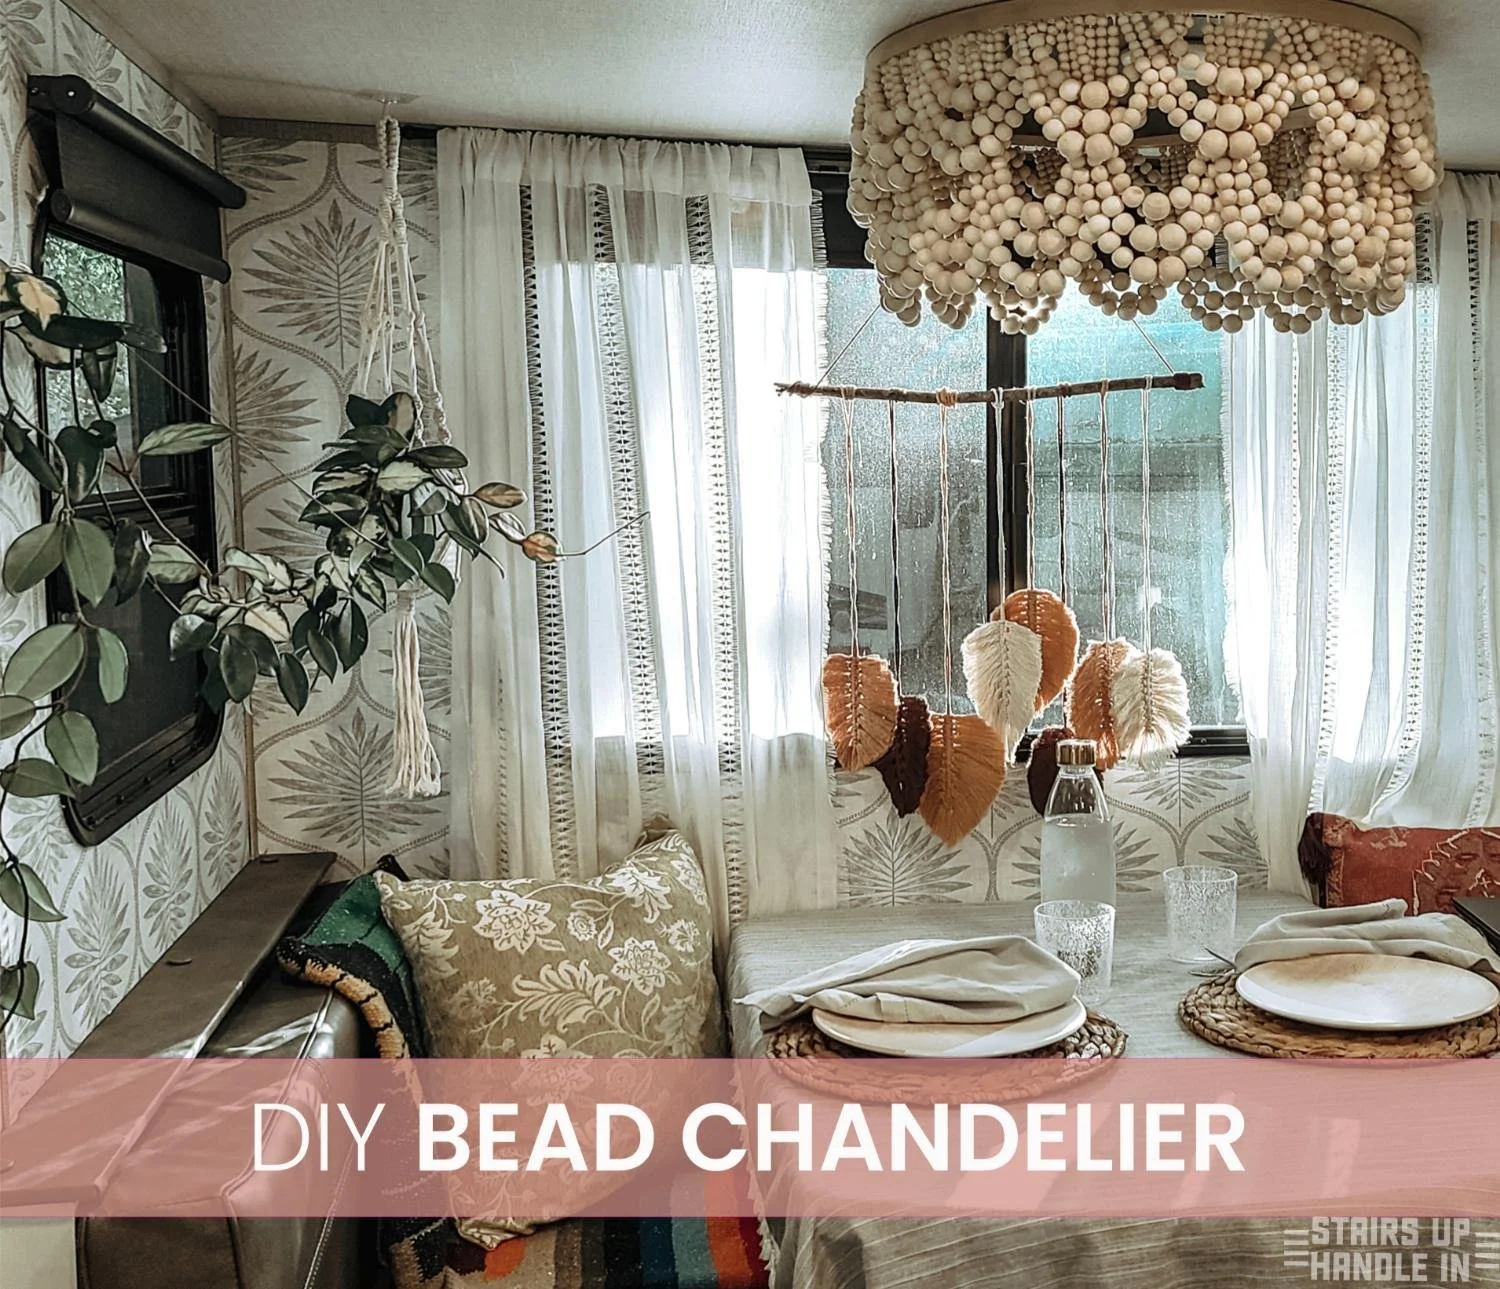
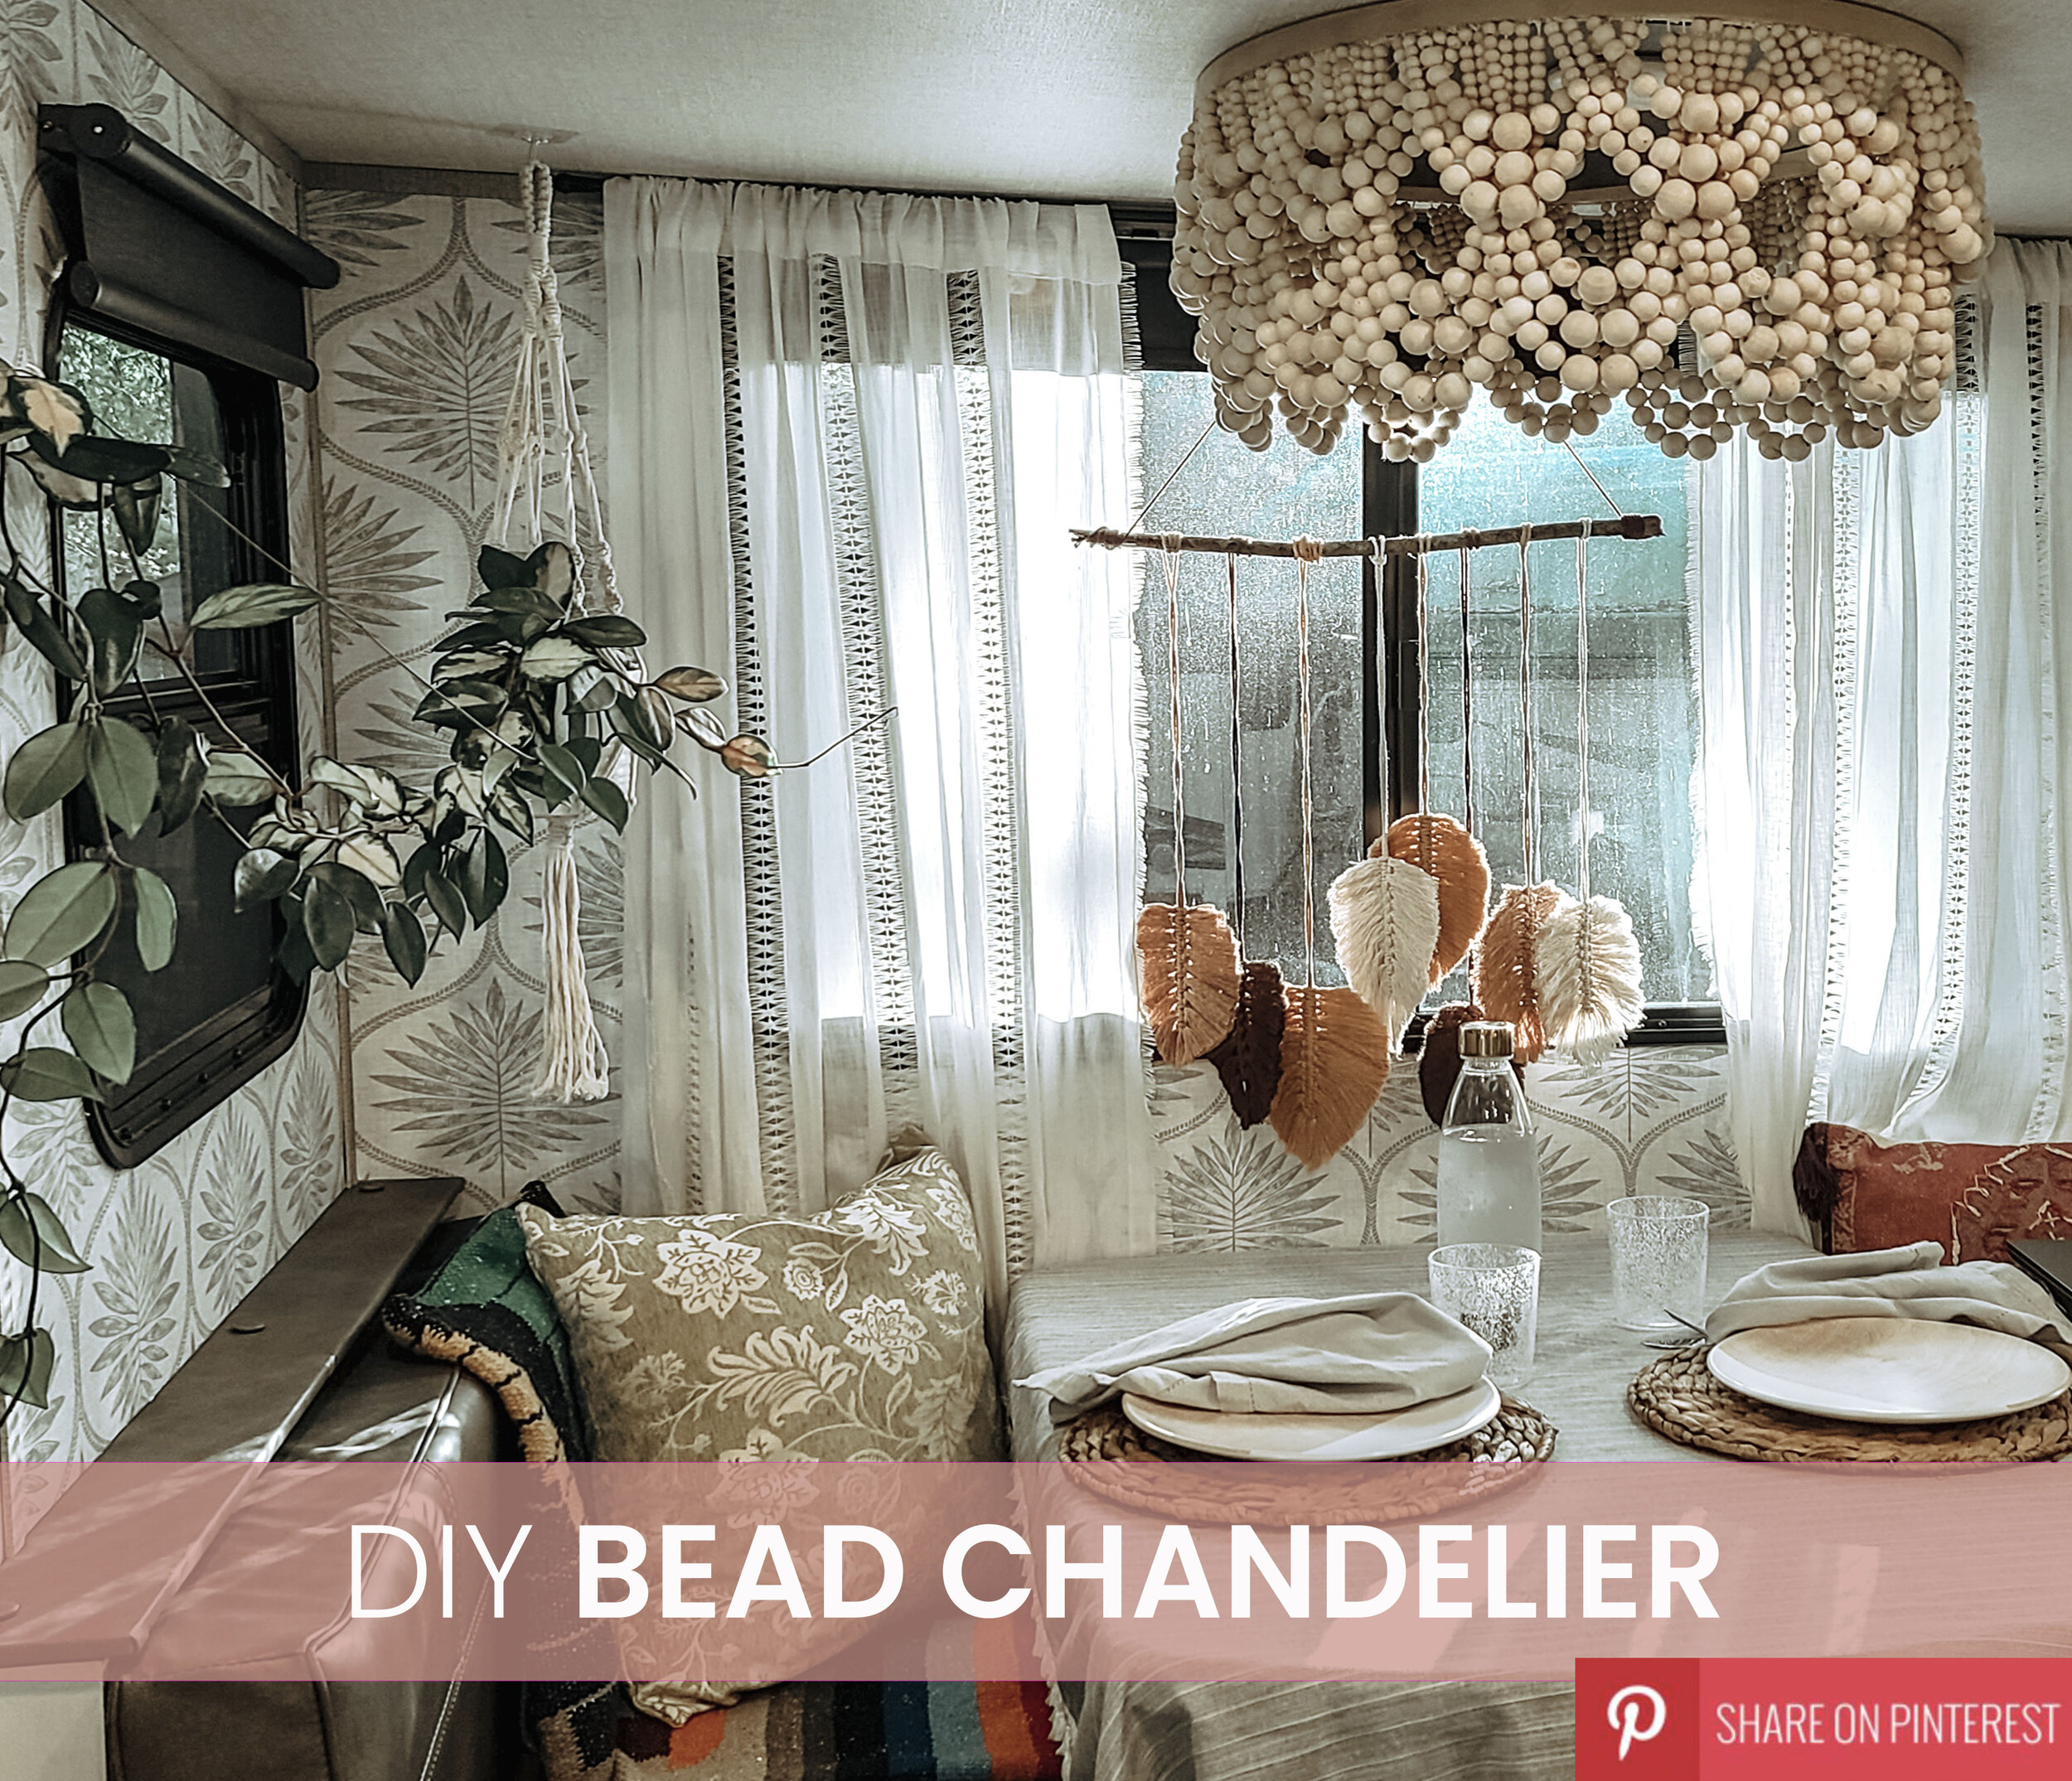
How to Make a Chandelier out of Beads + Save $100s (fit for your RV)
How to Make a Chandelier Out of Beads
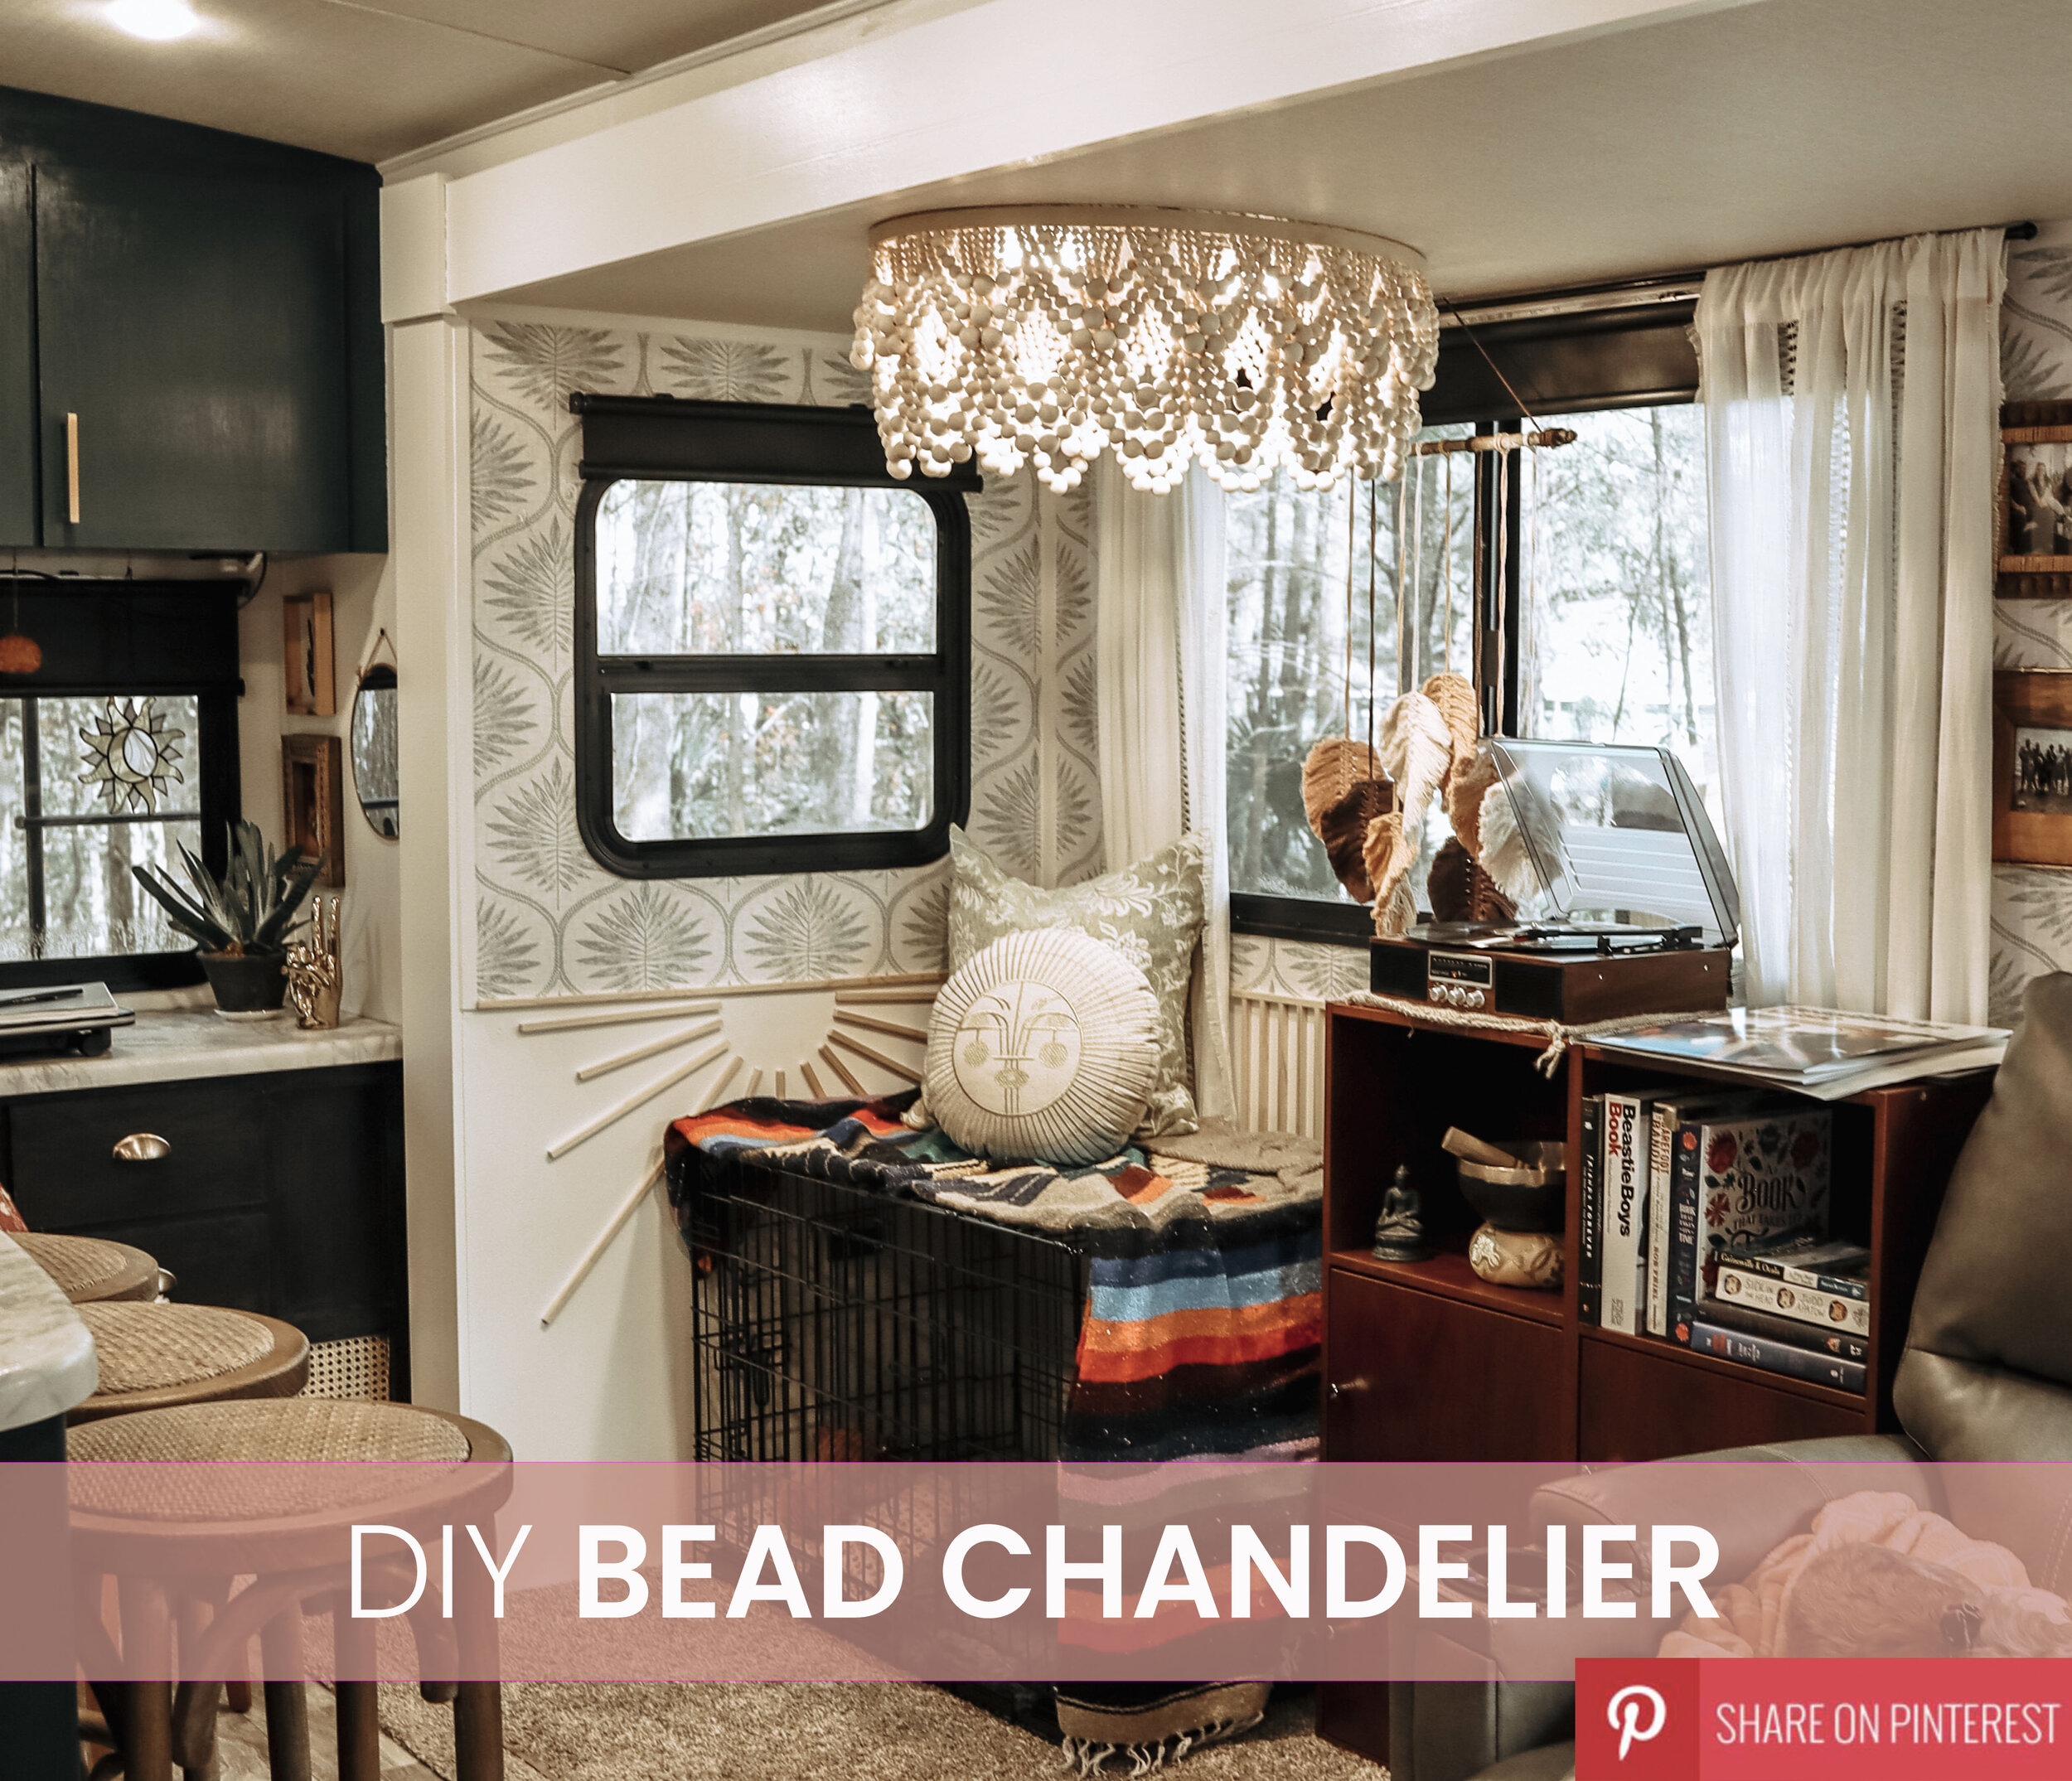
We get so.much.love on our Bead Chandelier, and I am delighted to finally have the chance to put together a DIY tutorial on how to make a chandelier out of beads.
If you found this blog while searching for RV decorating ideas, then I would share that what we love most about this Bead Chandelier is that it actually hangs around the existing light fixture, so there are no home improvement skills, no wiring, or major fabrication needed.
If you found this blog while contemplating if you want to spend hundreds and hundreds of dollars on the Pottery Barn wood bead chandelier, then I would share that this tutorial will give you a great jumping-off point, leaving you with the flexibility to consider using it as a shade or adding a light kit and wiring it as extra light fixtures, without the Pottery Barn price tag.
Anytime we have shared photos of this space in our rig, we always get asked where we found this fixture. After seeing the price of the Pottery Barn pendant light, I went to the internet to figure out how to make my own.
Since then, I feel like I have said “I have a blog coming soon!” far too many times – and I am happy to share that I finally sat down and wrote out this blog post on how to make a chandelier out of beads for yourself!
DIY WOODEN BEAD CHANDELIER
Before we get into the details, I have to say - we seriously LOVE the RV community. Like I mentioned, we get a lot of love on photos of our chandy, but really we have gained so much inspiration from seeing what others are doing to make their rigs their home.
It really feels great to be able to share back and forth and know that we may inspire others the same way we have been inspired. [Insert cheesy thank you].
Also, I should mention that this little beauty can be hung in any home - big or small, on wheels or bricks - you can make it your own to fit your personal space.

How to Make a Chandelier Out of Beads in Just 10 Steps
I would rate this project between beginner and moderate, and the time it takes to complete this project is significant but will vary depending on the size. If you are familiar with completing DIY projects then you might find it a bit easier. The steps below are specific to the size and adaptation that we made for our rig. When considering how you will make a chandelier out of beads, you will need to adapt it to fit but it can be personalized to fit your own space or RV decor.
My advice: make sure you have plenty of working space that will be undisturbed, and a good Netflix series ready to binge. (Also acceptable: re-watch Schitt’s Creek.)
Here’s what you need:
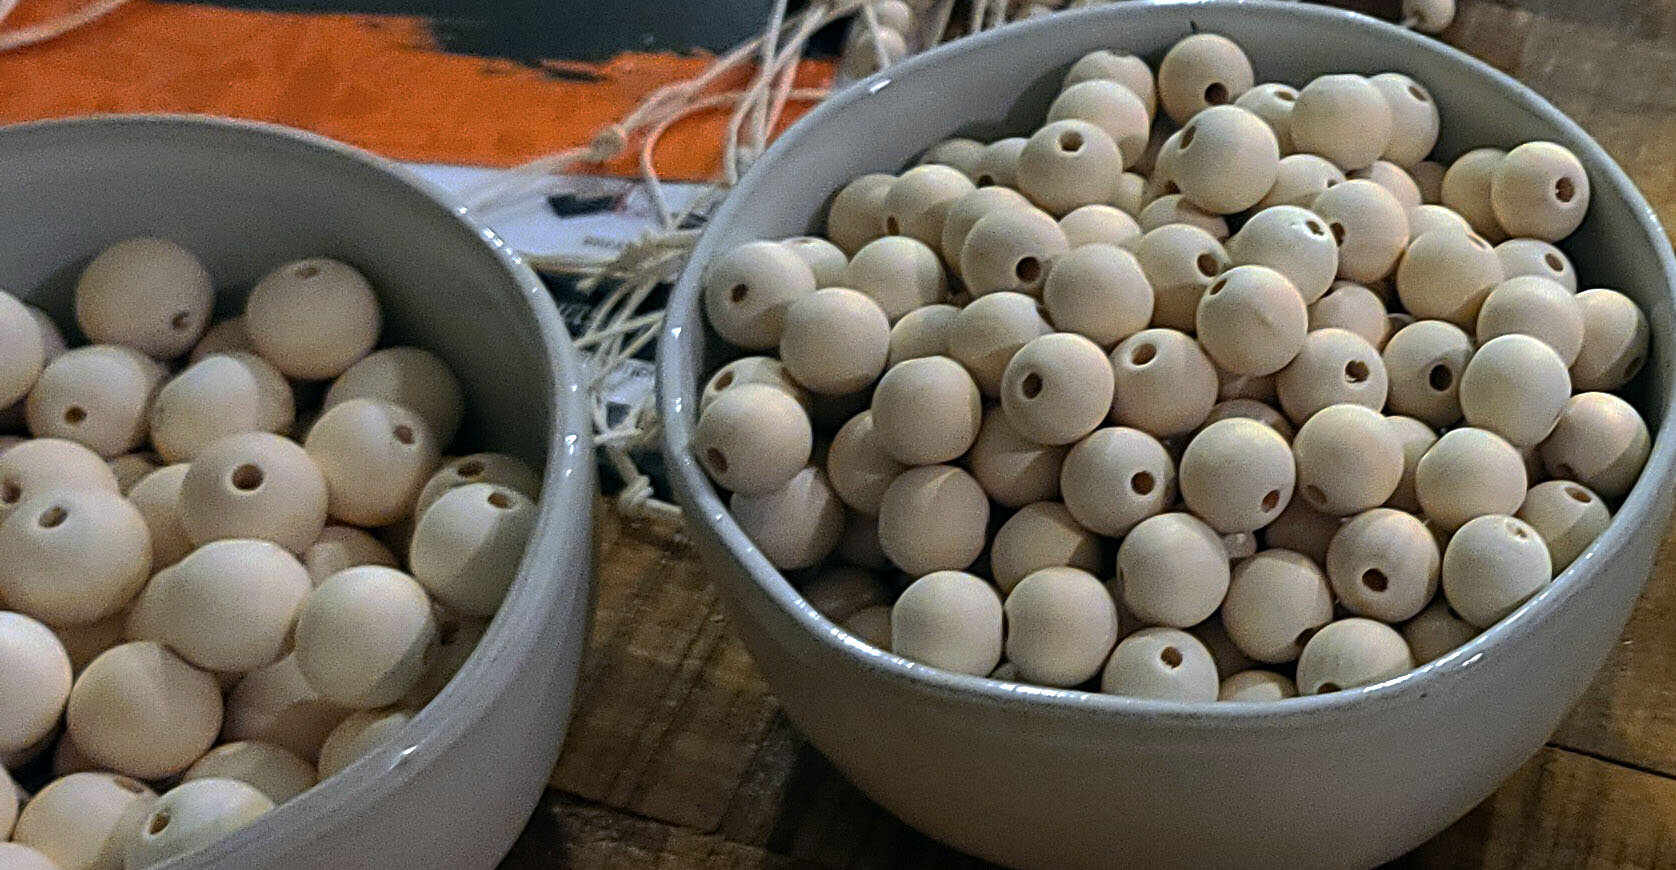
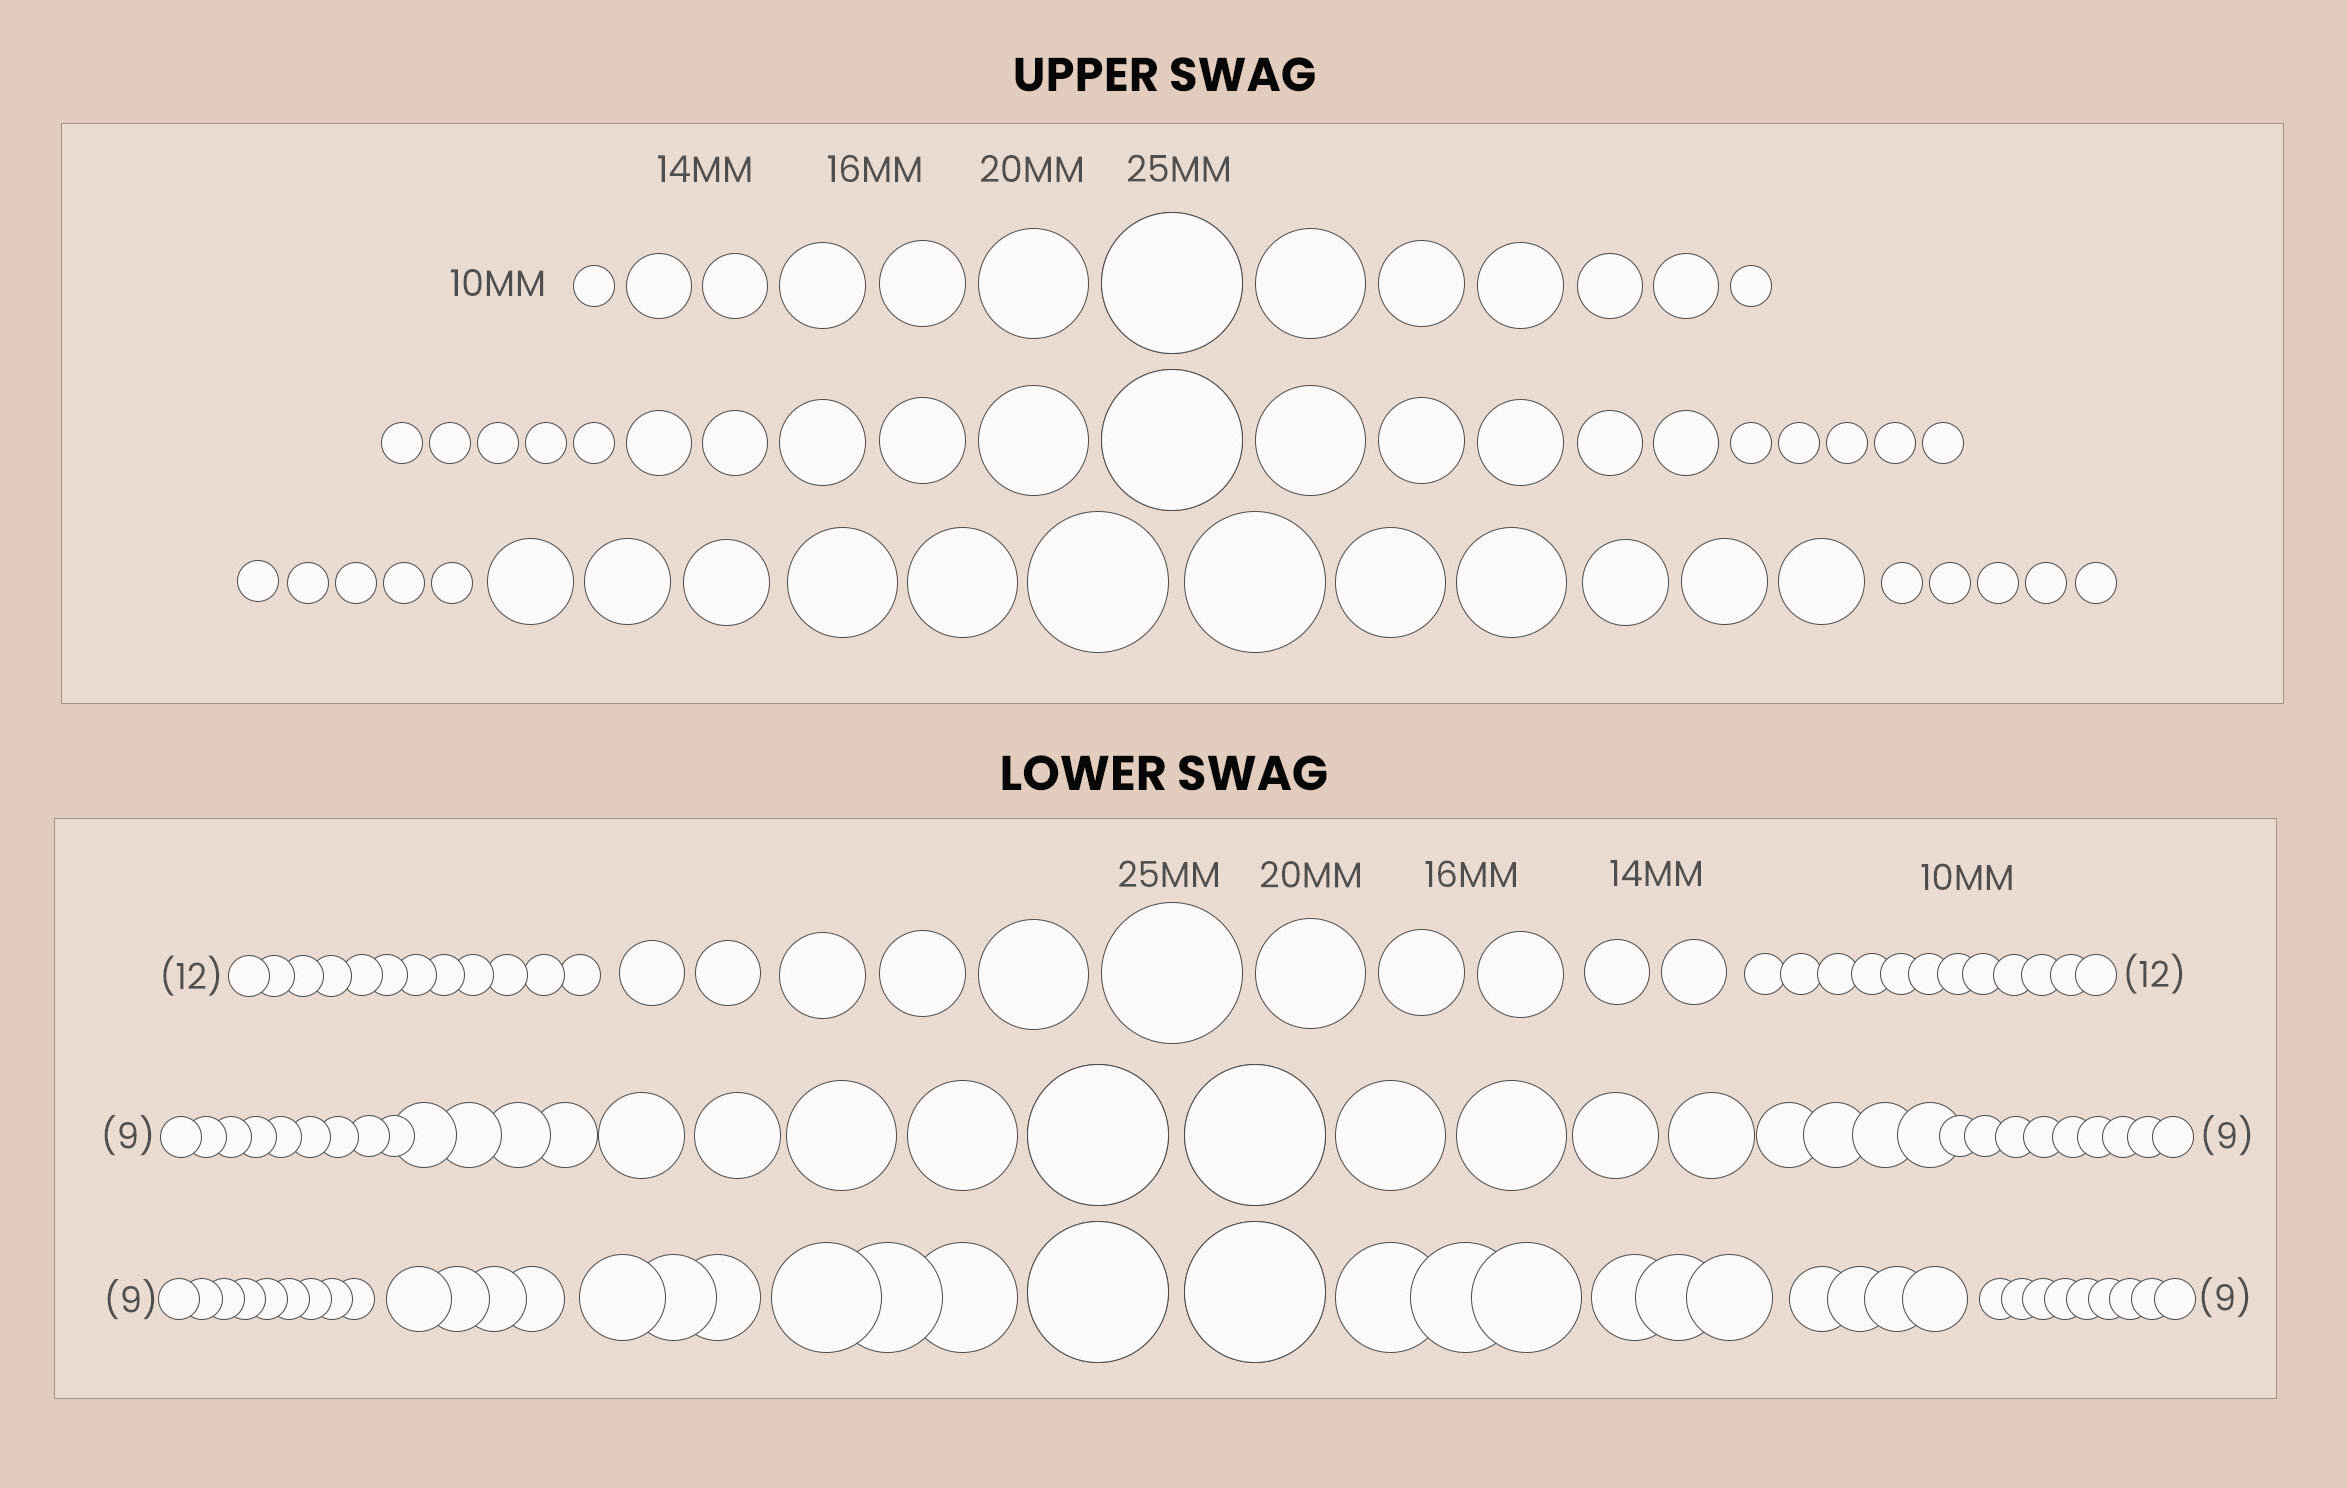
Wooden Beads in the following sizes and approximate quantities:
10mm, #1,312
14mm, #448
16mm, #448
20mm, #320
25mm, #144
Cotton Twine
Embroidery Hoop (2 sets)
Large Eye Needle
Scissors
Clamps
Wood Glue
(Optional: Brackets, Light kit)

As you review the following steps, please consider that we built this to fit around the existing lighting panel in our Grand Design 2670mk travel trailer.
This light fixture measures 24” long, 12” wide and 6” wide at the angled ends. You will need to adjust the size of the hoop as the main determining factor in the final resulting size to best fit your needs.
The number of beads will also vary as you make alterations to the size of the hoop.
The best part is - you can really use this base set of directions to create the perfect fixture for your own beautiful space.
10 STEPS TO DIY WOODEN BEAD CHANDELIER
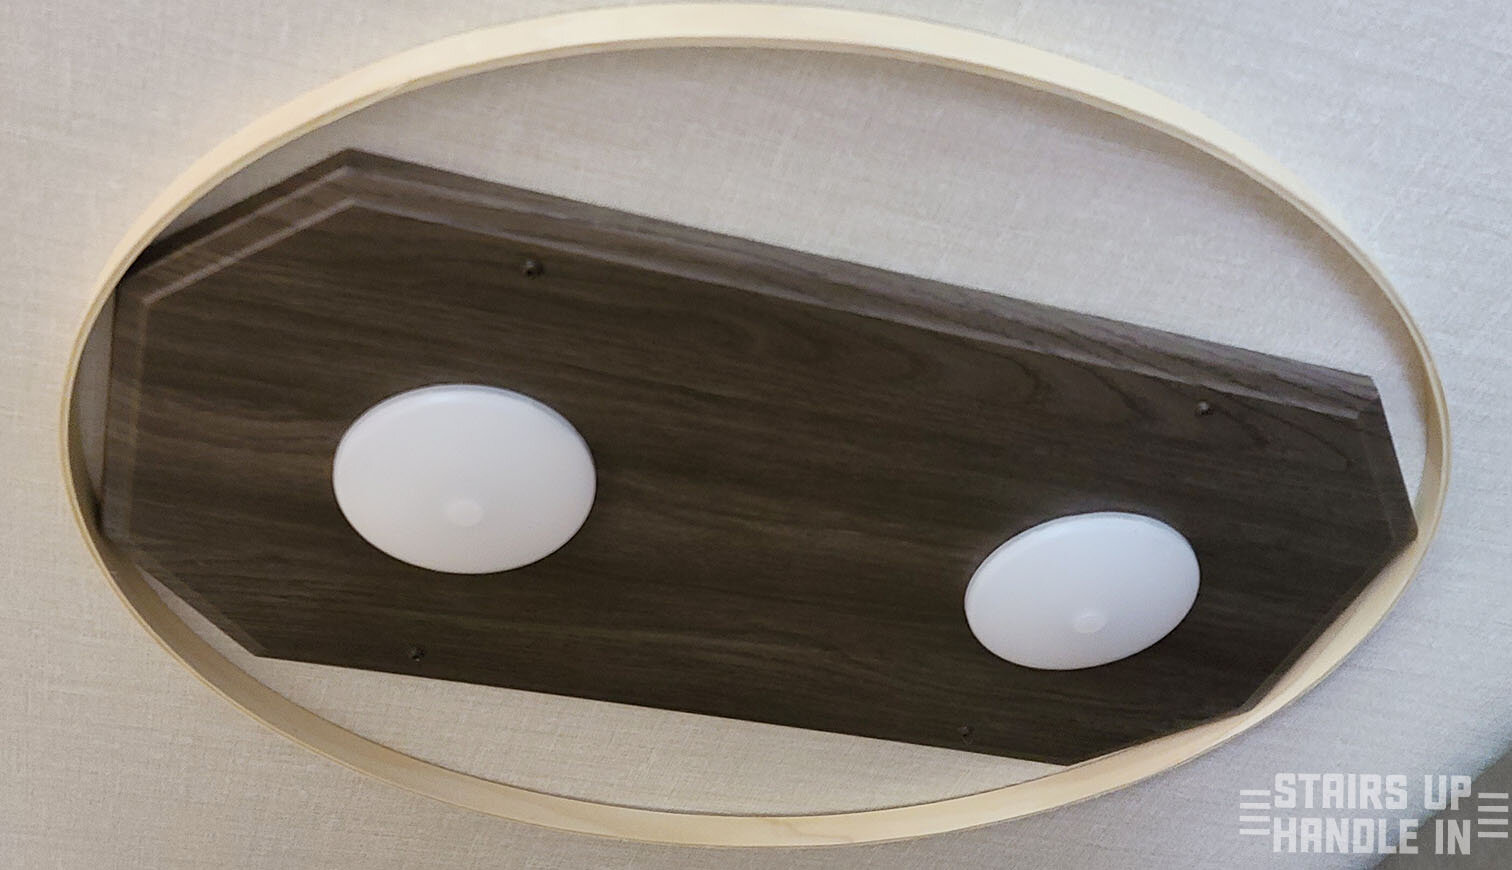
1. Embroidery hoops include an inner and outer hoop. You will want to remove the closure from the outer hoop (this is held together with staples and can be pried off pretty easily). Test fit the inner hoop around the light fixture.
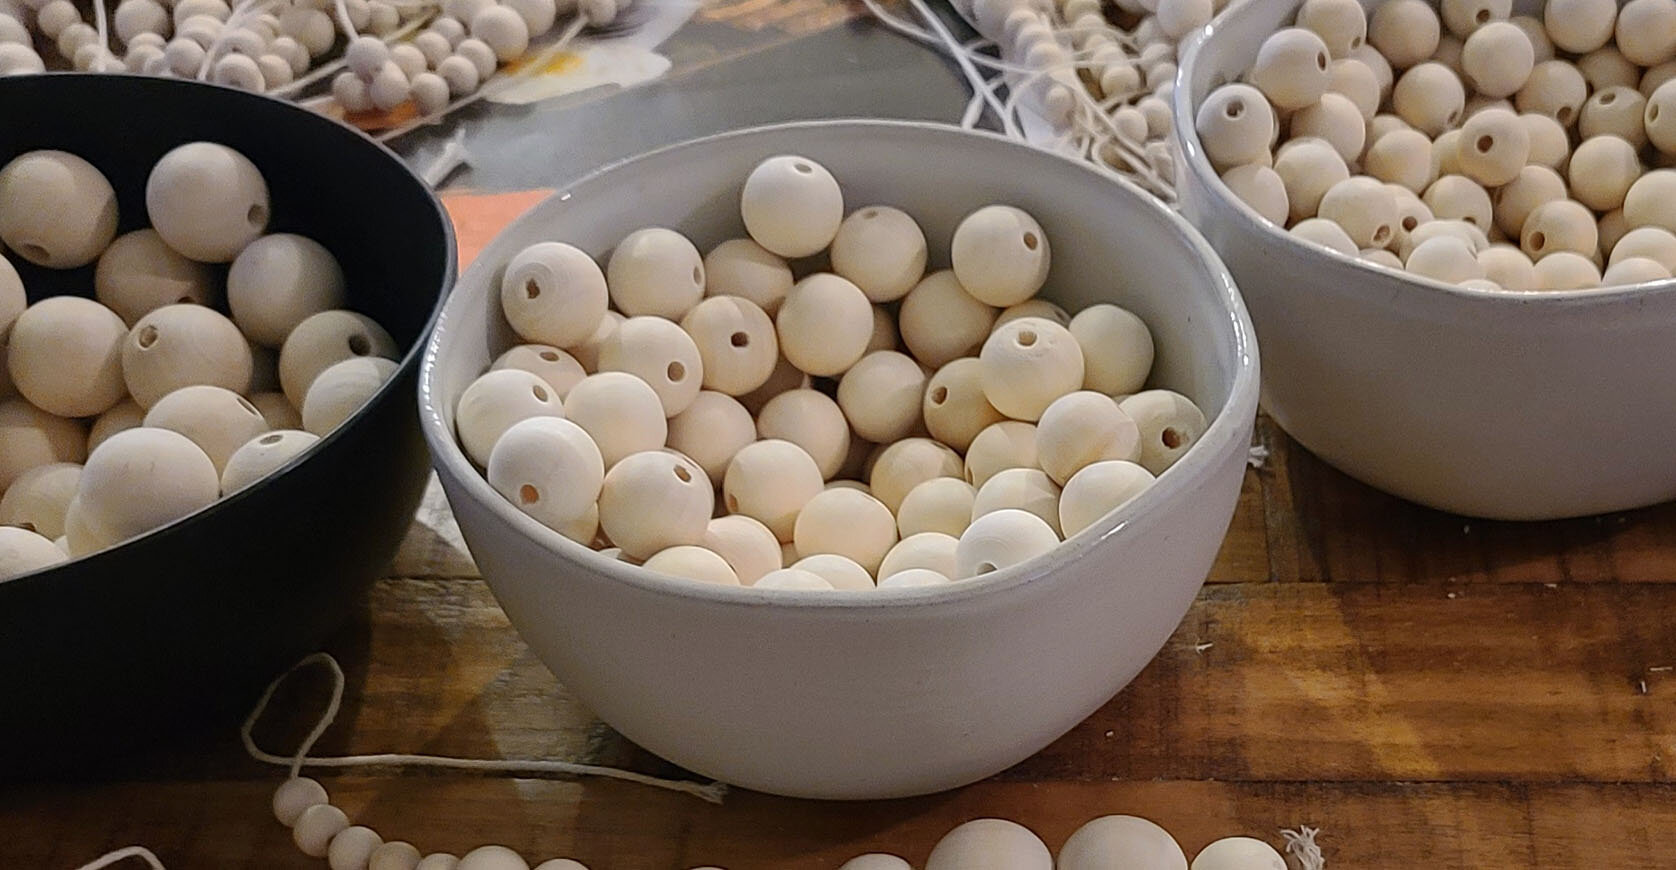
2. Tip: Organize the beads into bowls, separated by size. For the purpose of this tutorial, a strand is equivalent to one string of beads and a swag is the group of 3 strands of beads. The chandelier is made up of an upper row of strands and a lower row of strands.
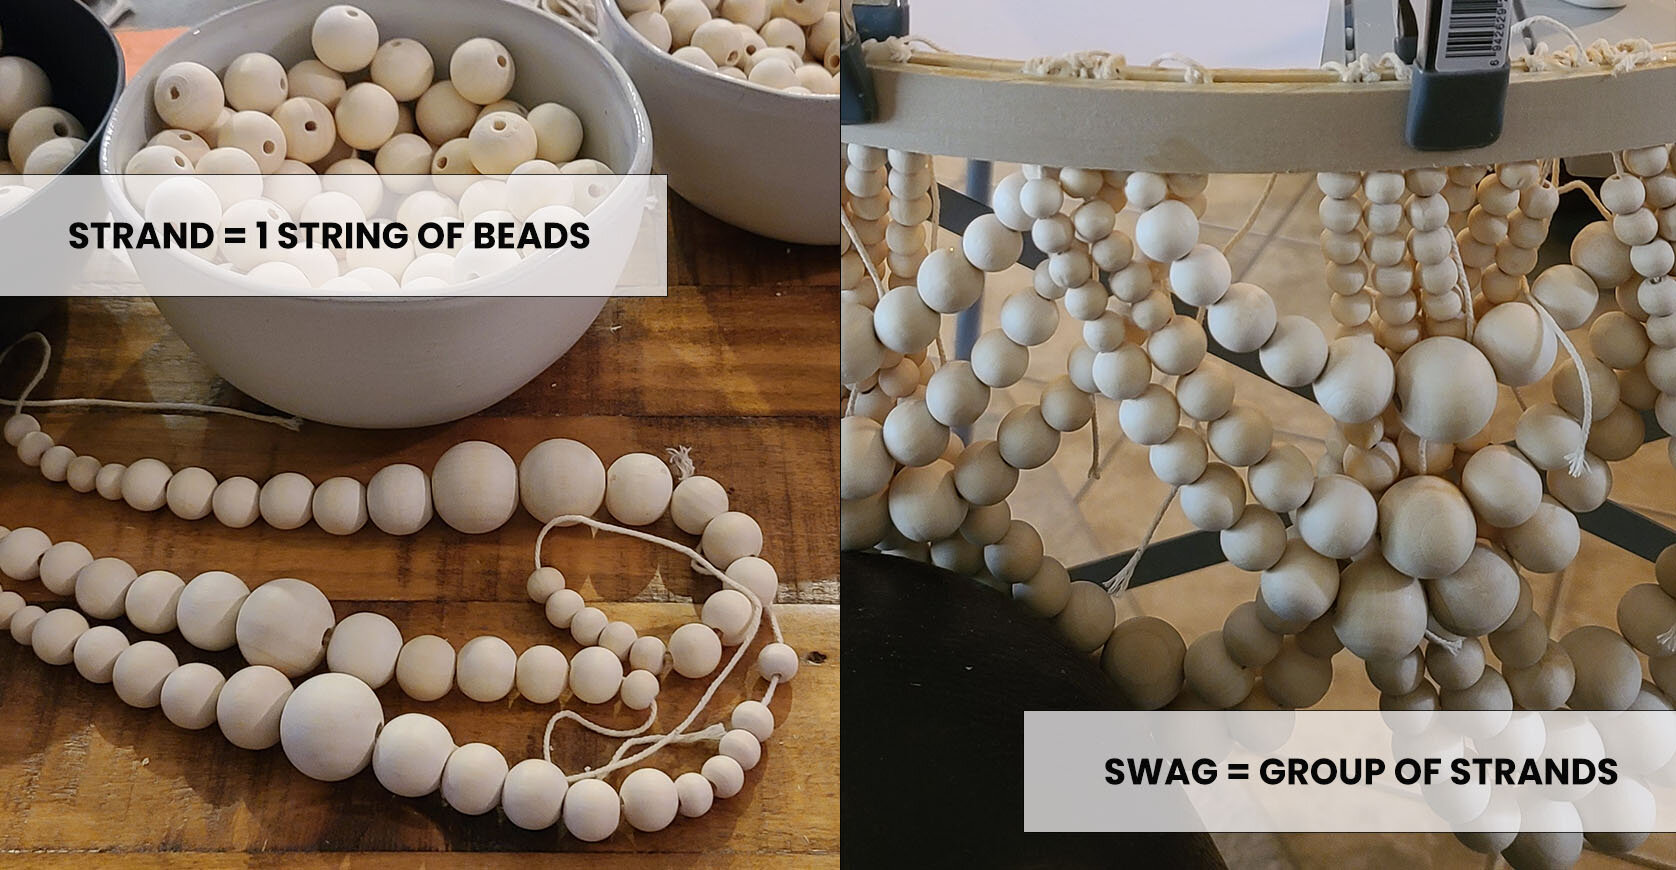
3. Here’s where things get a little tedious - so put on that show and get comfortable. Using the large eye needle and cotton twine, you will start to string the beads. You can change this up to best fit your needs, but see below for the exact count that I used to make the one that is pictured.
You will need 16 strands of each row pictured below, for a total of 96 strands (48 for each level).
As you string each strand of beads, you will want to leave a good 6-8” of twine at each end, and then loosely tie the ends together and set them aside. I created a pile of each size on my table, but you could also hang them from hangers.
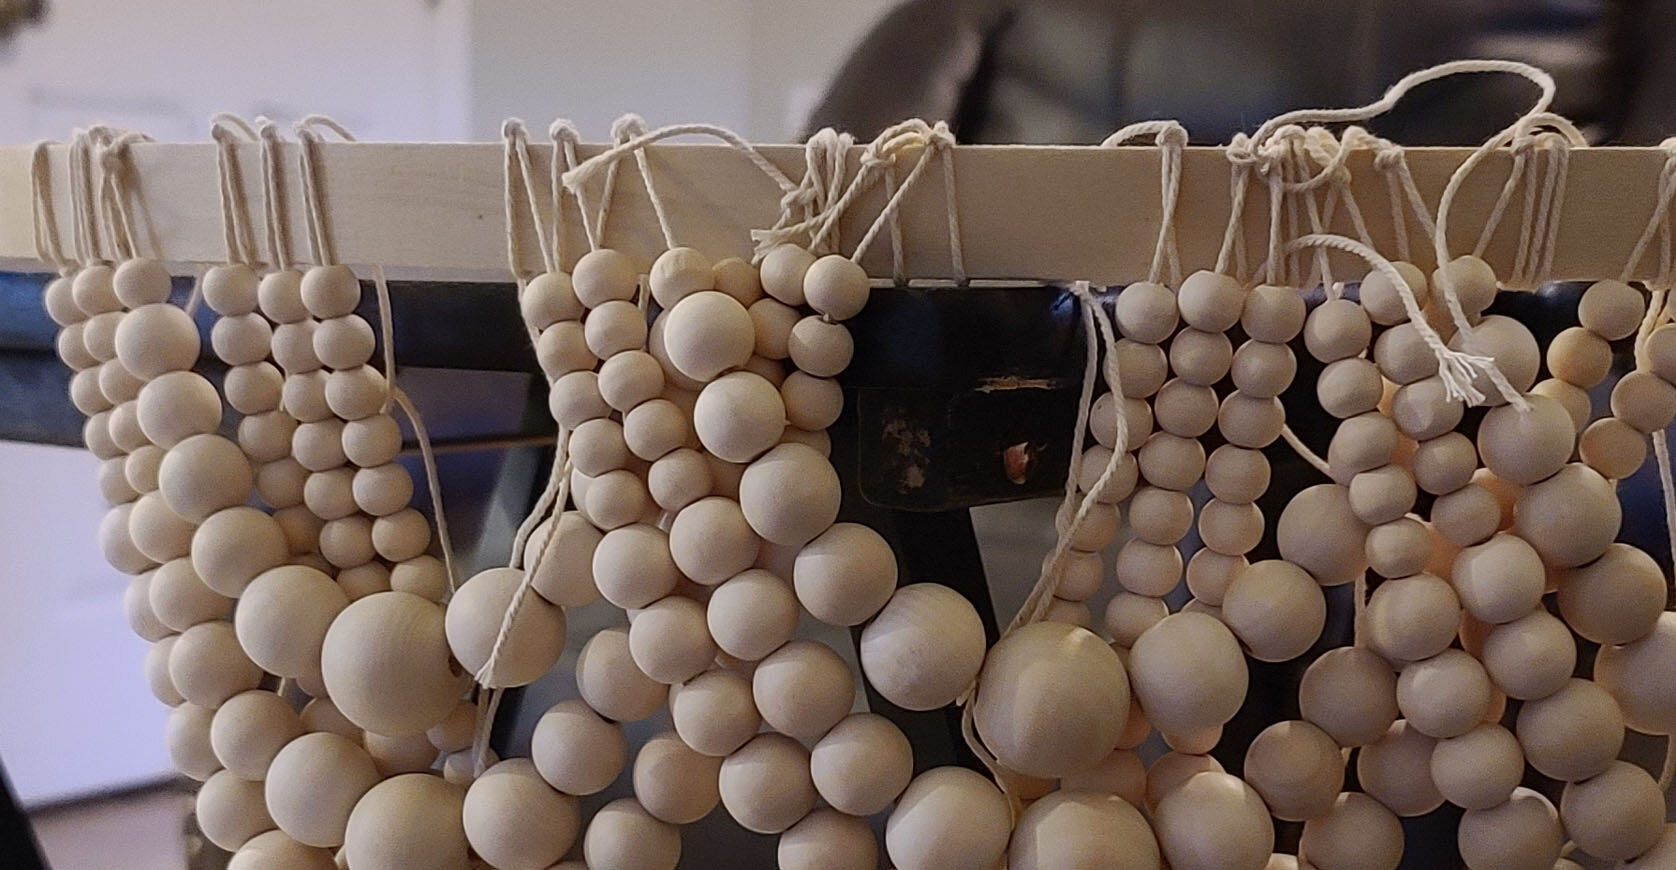
4. Once you have your strands complete, you will begin to tie them onto the embroidery hoop, creating swags. You can see how I started to place the swags, overlapping them so the left side of the new swag started just inside of the right side of the previous swag.

5. Repeat the same process with the lower level swags. One thing that helps during this process as you start to add more weight is to balance the hoop on a supported surface. I used a small table that held the weight, but allowed access to tying strands.

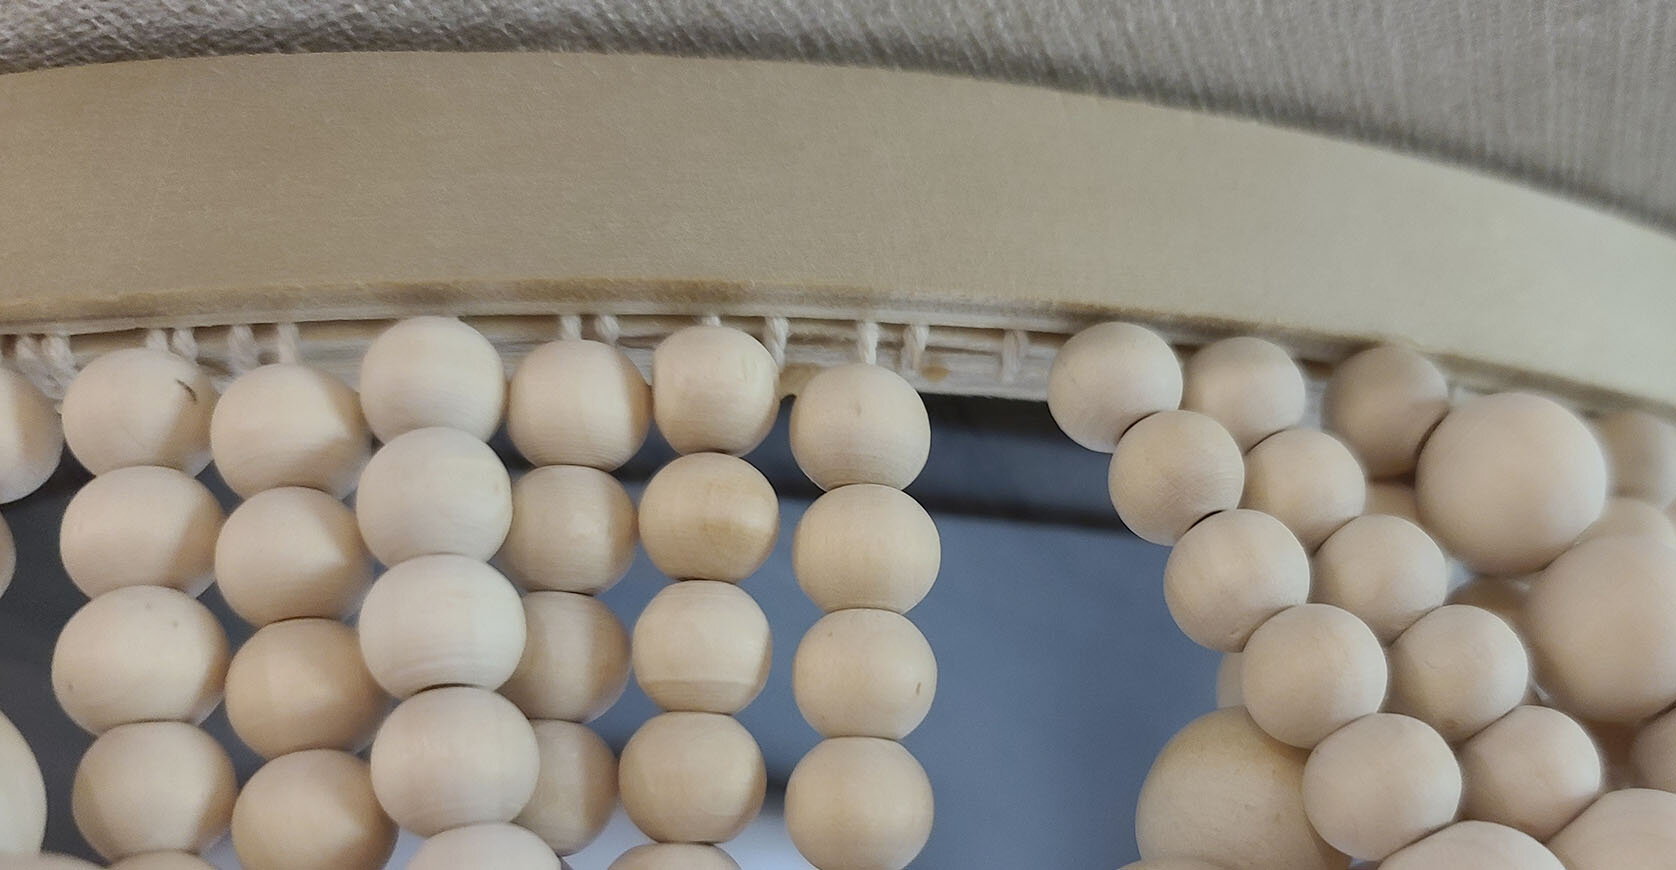
6. Once you have tied all of the swags into place, you will install the inner and outer embroidery hoops, which will hide the strings. Make a small bead of wood glue around the hoop, and then use clamps to hold it all together and let dry for the time recommended by the manufacturer.

You can see from these angles, you have one hoop inside, the middle hoop with the strings knotted around it, and the outer hoop that hides the strings once hung.
7. Optional: Here is where you can really customize the installation of your new chandelier. As I mentioned, ours was fitted around the existing light fixture, however you can choose to add a light kit or add chain or heavy duty twine to hang it from the ceiling. We are sharing how we installed it in our Grand Design Imagine 2670mk.
8. To install around the existing fixture, we stretched the hoop into an oval shape. In full transparency, it was at this point that I anxiously waited for the entire thing to snap, breaking apart with beads flying everywhere. It is very snug. One option that we considered but did not have to do is that you could trim out the inner hoop at the spots where the corners hit.
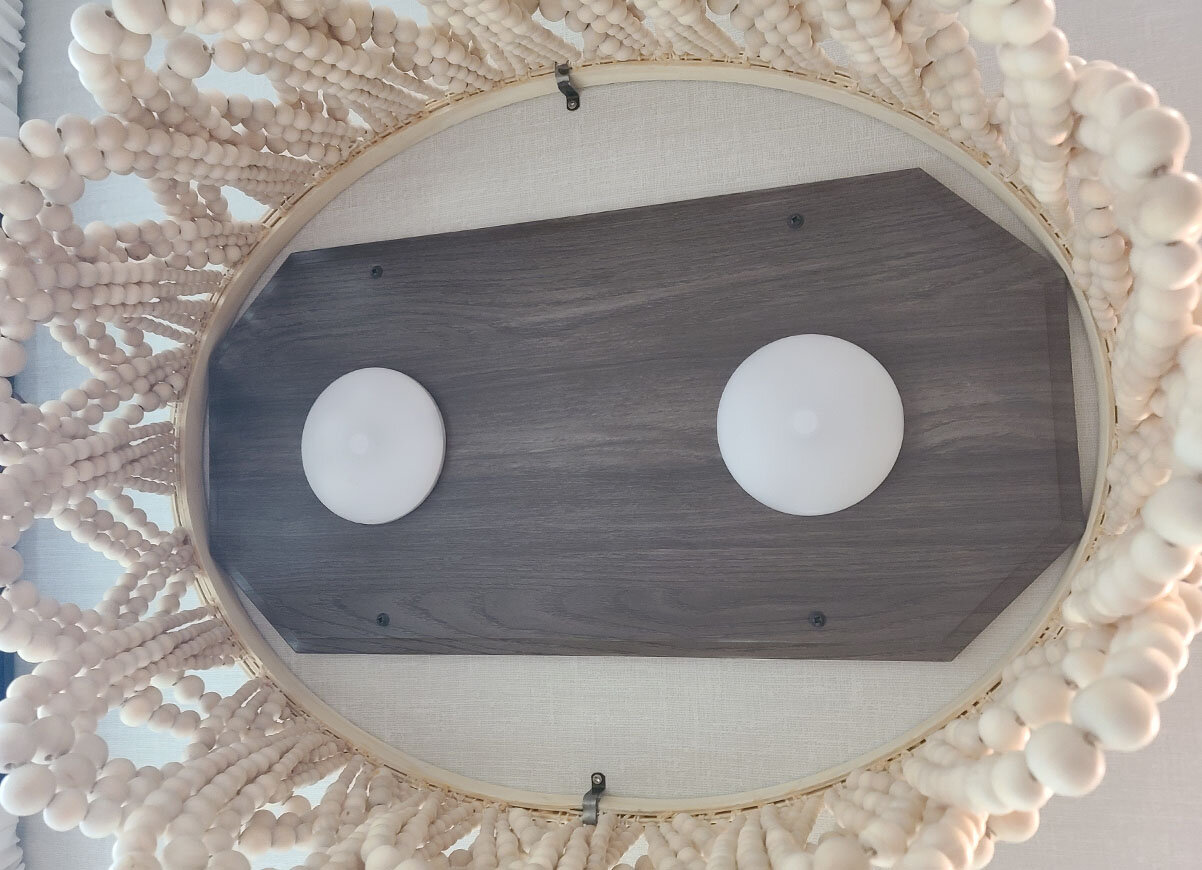
9. Because the fixture is so snug - it can almost hold itself in place. We actually left it as is for quite some time when we were stationary, but took the step to secure it once we started to move our rig around. We secured it with 2 small “L” shaped brackets. You can see the brackets from below the fixture but not from the side.

10. Flip the light on. Grab your favorite bevvy, stand back and enjoy the endless chandy shadows!
What do you think about this bead chandelier?
I would love to see your take on this beautiful Wooden Bead Chandelier! Did our blog help you learn how to make a chandelier out of beads?
Tag us on Instagram @stairsuphandlein so we can check it out, and make sure you are subscribed to our newsletter to see even more RV decorating ideas!
Amazon Shopping List for How to Make a Chandelier out of Beads
Grab all the essential items to get started on making your own bead chandelier.
This list includes the items that we used to make ours – at the size that fits in our RV.
Before ordering, be sure that you are accounting for any changes that you will need to make in order for it to fit into your personal space.


Pin How to Make a Chandelier out of Beads for Later
WE’D LOVE TO HEAR FROM YOU
Share your questions or comments below!
We’re Jen + Eric
After falling in love with everywhere we went, we changed our lives and became full-time RVers.
In the past 3 years, we’ve visited over 20 states, remodeled our first RV, hiked miles of trails, and proved that minimalism is in fact
NOT a pre-requisite for RV living.
Stick around, because we’re sharing everything
from how to get started, our learned experiences,
and most important …
how to make RV life a little ✨ EXTRA ✨